表單組件
表單組件讓您可以建立、處理和重複使用表單。
表單組件是一個工具,可協助您解決終端使用者與應用程式中的資料互動和修改資料的問題。雖然傳統上這是透過 HTML 表單完成的,但此組件著重於處理往返於您的用戶端和應用程式的資料,無論該資料是來自一般的表單 POST 還是 API。
安裝
1
$ composer require symfony/form注意
如果您在 Symfony 應用程式之外安裝此組件,您必須在程式碼中引入 vendor/autoload.php 檔案,以啟用 Composer 提供的類別自動載入機制。請閱讀這篇文章以取得更多詳細資訊。
設定
另請參閱
本文說明如何在任何 PHP 應用程式中將表單功能用作獨立組件。請閱讀「表單」文章以瞭解如何在 Symfony 應用程式中使用它。
在 Symfony 中,表單由物件表示,而這些物件是使用表單工廠建立的。建立表單工廠是透過工廠方法 Forms::createFormFactory 完成的
1
2
3
use Symfony\Component\Form\Forms;

$formFactory = Forms::createFormFactory();
這個工廠已經可以用於建立基本表單,但它缺少對非常重要功能的支援
- 請求處理: 支援請求處理和檔案上傳;
- CSRF 保護: 支援防止跨站請求偽造 (CSRF) 攻擊的保護;
- 模板: 與模板層整合,讓您在渲染表單時重複使用 HTML 片段;
- 翻譯: 支援翻譯錯誤訊息、欄位標籤和其他字串;
- 驗證: 與驗證庫整合,為提交的資料產生錯誤訊息。
Symfony 表單組件依賴其他程式庫來解決這些問題。大多數時候,您會使用 Twig 和 Symfony HttpFoundation、Translation 和 Validator 組件,但您可以將其中任何一個替換為您選擇的不同程式庫。
以下章節說明如何將這些程式庫插入表單工廠。
提示
請求處理
若要處理表單資料,您需要呼叫 handleRequest() 方法
1
$form->handleRequest();在幕後,這使用 NativeRequestHandler 物件根據表單上設定的 HTTP 方法(預設為 POST)從正確的 PHP 超全域變數(即 $_POST 或 $_GET)中讀取資料。
另請參閱
如果您需要更精確地控制表單提交的時間或傳遞給表單的資料,請使用 submit() 方法來處理表單提交。
CSRF 保護
防止 CSRF 攻擊的保護機制已內建於表單組件中,但您需要明確啟用它或將其替換為自訂解決方案。如果您想使用內建支援,請先安裝 Security CSRF 組件
1
$ composer require symfony/security-csrf以下程式碼片段將 CSRF 保護新增至表單工廠
1 2 3 4 5 6 7 8 9 10 11 12 13 14 15 16 17 18
use Symfony\Component\Form\Extension\Csrf\CsrfExtension;
use Symfony\Component\Form\Forms;
use Symfony\Component\HttpFoundation\RequestStack;
use Symfony\Component\Security\Csrf\CsrfTokenManager;
use Symfony\Component\Security\Csrf\TokenGenerator\UriSafeTokenGenerator;
use Symfony\Component\Security\Csrf\TokenStorage\SessionTokenStorage;
// creates a RequestStack object using the current request
$requestStack = new RequestStack([$request]);
$csrfGenerator = new UriSafeTokenGenerator();
$csrfStorage = new SessionTokenStorage($requestStack);
$csrfManager = new CsrfTokenManager($csrfGenerator, $csrfStorage);
$formFactory = Forms::createFormFactoryBuilder()
// ...
->addExtension(new CsrfExtension($csrfManager))
->getFormFactory();7.2
在 Symfony 7.2 中引入了將請求傳遞給 RequestStack 類別建構子的支援。
在內部,此擴充功能會自動將一個隱藏欄位新增到每個表單(預設名為 _token),其值由 CSRF 產生器自動產生,並在繫結表單時進行驗證。
提示
如果您未使用 HttpFoundation 組件,則可以使用 NativeSessionTokenStorage 來替代,後者依賴 PHP 的原生會話處理
1 2 3 4
use Symfony\Component\Security\Csrf\TokenStorage\NativeSessionTokenStorage;
$csrfStorage = new NativeSessionTokenStorage();
// ...您可以使用 csrf_protection 選項為每個表單停用 CSRF 保護
1 2 3 4
use Symfony\Component\Form\Extension\Core\Type\FormType;
$form = $formFactory->createBuilder(FormType::class, null, ['csrf_protection' => false])
->getForm();Twig 模板
如果您使用表單組件來處理 HTML 表單,您需要一種將表單渲染為 HTML 表單欄位的方法(包含欄位值、錯誤和標籤)。如果您使用 Twig 作為您的模板引擎,表單組件提供豐富的整合。
若要使用整合,您需要 twig bridge,它提供 Twig 和數個 Symfony 組件之間的整合
1
$ composer require symfony/twig-bridgeTwigBridge 整合為您提供數個 Twig 函式,可協助您渲染每個欄位的 HTML 小工具、標籤、說明和錯誤(以及其他一些東西)。若要設定整合,您需要引導或存取 Twig 並新增 FormExtension
1 2 3 4 5 6 7 8 9 10 11 12 13 14 15 16 17 18 19 20 21 22 23 24 25 26 27 28 29 30 31 32 33 34 35 36 37 38 39 40
use Symfony\Bridge\Twig\Extension\FormExtension;
use Symfony\Bridge\Twig\Form\TwigRendererEngine;
use Symfony\Component\Form\FormRenderer;
use Symfony\Component\Form\Forms;
use Twig\Environment;
use Twig\Loader\FilesystemLoader;
use Twig\RuntimeLoader\FactoryRuntimeLoader;
// the Twig file that holds all the default markup for rendering forms
// this file comes with TwigBridge
$defaultFormTheme = 'form_div_layout.html.twig';
$vendorDirectory = realpath(__DIR__.'/../vendor');
// the path to TwigBridge library so Twig can locate the
// form_div_layout.html.twig file
$appVariableReflection = new \ReflectionClass('\Symfony\Bridge\Twig\AppVariable');
$vendorTwigBridgeDirectory = dirname($appVariableReflection->getFileName());
// the path to your other templates
$viewsDirectory = realpath(__DIR__.'/../views');
$twig = new Environment(new FilesystemLoader([
$viewsDirectory,
$vendorTwigBridgeDirectory.'/Resources/views/Form',
]));
$formEngine = new TwigRendererEngine([$defaultFormTheme], $twig);
$twig->addRuntimeLoader(new FactoryRuntimeLoader([
FormRenderer::class => function () use ($formEngine, $csrfManager): FormRenderer {
return new FormRenderer($formEngine, $csrfManager);
},
]));
// ... (see the previous CSRF Protection section for more information)
// adds the FormExtension to Twig
$twig->addExtension(new FormExtension());
// creates a form factory
$formFactory = Forms::createFormFactoryBuilder()
// ...
->getFormFactory();您的 Twig 設定的確切細節會有所不同,但目標始終是將 FormExtension 新增至 Twig,這讓您可以存取用於渲染表單的 Twig 函式。若要執行此操作,您首先需要建立 TwigRendererEngine,您可以在其中定義您的表單主題(即定義表單 HTML 標記的 resources/files)。
如需有關渲染表單的一般詳細資訊,請參閱「如何自訂表單渲染」。
注意
如果您使用 Twig 整合,請閱讀下方的「表單組件」以取得有關所需翻譯篩選器的詳細資訊。
翻譯
如果您將 Twig 整合與其中一個預設表單主題檔案(例如 form_div_layout.html.twig)搭配使用,則有一個 Twig 篩選器 (trans) 用於翻譯表單標籤、錯誤、選項文字和其他字串。
若要新增 trans Twig 篩選器,您可以使用內建的 TranslationExtension,它與 Symfony 的 Translation 組件整合,或者透過您自己的 Twig 擴充功能自行新增 Twig 篩選器。
若要使用內建整合,請確保您的專案已安裝 Symfony 的 Translation 和 Config 組件
1
$ composer require symfony/translation symfony/config接下來,將 TranslationExtension 新增至您的 Twig\Environment 實例
1 2 3 4 5 6 7 8 9 10 11 12 13 14 15 16 17 18 19 20 21
use Symfony\Bridge\Twig\Extension\TranslationExtension;
use Symfony\Component\Form\Forms;
use Symfony\Component\Translation\Loader\XliffFileLoader;
use Symfony\Component\Translation\Translator;
// creates the Translator
$translator = new Translator('en');
// somehow load some translations into it
$translator->addLoader('xlf', new XliffFileLoader());
$translator->addResource(
'xlf',
__DIR__.'/path/to/translations/messages.en.xlf',
'en'
);
// adds the TranslationExtension (it gives us trans filter)
$twig->addExtension(new TranslationExtension($translator));
$formFactory = Forms::createFormFactoryBuilder()
// ...
->getFormFactory();根據您的翻譯載入方式,您現在可以將字串鍵(例如欄位標籤)及其翻譯新增至您的翻譯檔案。
如需有關翻譯的更多詳細資訊,請參閱「翻譯」。
驗證
表單組件緊密地(但可選地)與 Symfony 的 Validator 組件整合。如果您使用不同的驗證解決方案,沒問題!取得您表單的提交/繫結資料(它是陣列或物件)並將其傳遞到您自己的驗證系統。
若要使用與 Symfony 的 Validator 組件的整合,請先確保它已安裝在您的應用程式中
1
$ composer require symfony/validator如果您不熟悉 Symfony 的 Validator 組件,請閱讀更多相關資訊:「驗證」。表單組件隨附 ValidatorExtension 類別,它會在繫結時自動將驗證套用至您的資料。然後,這些錯誤會對應到正確的欄位並進行渲染。
您與 Validation 組件的整合看起來會像這樣
1 2 3 4 5 6 7 8 9 10 11 12 13 14 15 16 17 18 19 20 21 22 23 24 25 26 27 28 29
use Symfony\Component\Form\Extension\Validator\ValidatorExtension;
use Symfony\Component\Form\Forms;
use Symfony\Component\Validator\Validation;
$vendorDirectory = realpath(__DIR__.'/../vendor');
$vendorFormDirectory = $vendorDirectory.'/symfony/form';
$vendorValidatorDirectory = $vendorDirectory.'/symfony/validator';
// creates the validator - details will vary
$validator = Validation::createValidator();
// there are built-in translations for the core error messages
$translator->addResource(
'xlf',
$vendorFormDirectory.'/Resources/translations/validators.en.xlf',
'en',
'validators'
);
$translator->addResource(
'xlf',
$vendorValidatorDirectory.'/Resources/translations/validators.en.xlf',
'en',
'validators'
);
$formFactory = Forms::createFormFactoryBuilder()
// ...
->addExtension(new ValidatorExtension($validator))
->getFormFactory();若要瞭解更多資訊,請跳至「表單組件」章節。
存取表單工廠
您的應用程式只需要一個表單工廠,而該工廠物件應該用於建立應用程式中的任何和所有表單物件。這表示您應該在應用程式的某些中央、引導部分中建立它,然後在需要建立表單時存取它。
注意
在本文檔中,表單工廠始終是一個名為 $formFactory 的區域變數。重點是您可能需要以更「全域」的方式建立此物件,以便您可以從任何地方存取它。
您如何存取您的表單工廠完全取決於您。如果您使用服務容器(例如 DependencyInjection 組件提供的),那麼您應該將表單工廠新增至您的容器,並在需要時取出它。如果您的應用程式使用全域或靜態變數(通常不是一個好主意),那麼您可以將物件儲存在某些靜態類別上或執行類似的操作。
建立簡單的表單
提示
如果您使用 Symfony 框架,則表單工廠會自動作為名為 form.factory 的服務提供,您可以將其注入為 Symfony\Component\Form\FormFactoryInterface。此外,預設的基礎控制器類別有一個 createFormBuilder() 方法,它是獲取表單工廠並在其上呼叫 createBuilder() 的捷徑。
建立表單是透過 FormBuilder 物件完成的,您可以在其中建立和設定不同的欄位。表單建構器是從表單工廠建立的。
1 2 3 4 5 6 7 8 9 10 11 12 13 14 15 16 17 18 19 20 21 22 23 24 25 26
// src/Controller/TaskController.php
namespace App\Controller;
use Symfony\Bundle\FrameworkBundle\Controller\AbstractController;
use Symfony\Component\Form\Extension\Core\Type\DateType;
use Symfony\Component\Form\Extension\Core\Type\TextType;
use Symfony\Component\HttpFoundation\Request;
use Symfony\Component\HttpFoundation\Response;
class TaskController extends AbstractController
{
public function new(Request $request): Response
{
// createFormBuilder is a shortcut to get the "form factory"
// and then call "createBuilder()" on it
$form = $this->createFormBuilder()
->add('task', TextType::class)
->add('dueDate', DateType::class)
->getForm();
return $this->render('task/new.html.twig', [
'form' => $form->createView(),
]);
}
}如您所見,建立表單就像編寫食譜:您為要建立的每個新欄位呼叫 add()。add() 的第一個參數是您的欄位名稱,第二個參數是完整類別名稱。表單組件隨附許多內建類型。
設定預設值
如果您需要表單載入一些預設值(或者您正在建立「編輯」表單),請在建立表單建構器時傳入預設資料
1 2 3 4 5 6 7 8 9 10 11 12 13 14 15 16 17 18 19 20 21 22 23 24
// src/Controller/DefaultController.php
namespace App\Controller;
use Symfony\Bundle\FrameworkBundle\Controller\AbstractController;
use Symfony\Component\Form\Extension\Core\Type\DateType;
use Symfony\Component\Form\Extension\Core\Type\TextType;
use Symfony\Component\HttpFoundation\Response;
class DefaultController extends AbstractController
{
public function new(Request $request): Response
{
$defaults = [
'dueDate' => new \DateTime('tomorrow'),
];
$form = $this->createFormBuilder($defaults)
->add('task', TextType::class)
->add('dueDate', DateType::class)
->getForm();
// ...
}
}提示
在此範例中,預設資料是一個陣列。稍後,當您使用 data_class 選項將資料直接繫結到物件時,您的預設資料將是該物件的實例。
渲染表單
現在表單已建立,下一步是渲染它。這是透過將特殊的表單「檢視」物件傳遞到您的模板(請注意上面控制器中的 $form->createView())並使用一組表單輔助函式來完成的
1 2 3 4 5
{{ form_start(form) }}
{{ form_widget(form) }}
<input type="submit">
{{ form_end(form) }}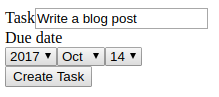
就這樣!透過列印 form_widget(form),表單中的每個欄位都會被渲染,以及標籤和錯誤訊息(如果有的話)。雖然這很方便,但它還不是很靈活(目前)。通常,您會想要個別渲染每個表單欄位,以便您可以控制表單的外觀。您將在表單自訂文章中學習如何做到這一點。
變更表單的方法和動作
預設情況下,表單會以 HTTP POST 請求提交到呈現該表單的相同 URI。此行為可以使用 FormType 欄位 和 FormType 欄位 選項來變更(method 選項也由 handleRequest() 用於判斷表單是否已提交)
1 2 3 4 5 6 7 8 9 10 11 12 13 14 15 16 17 18 19
// src/Controller/DefaultController.php
namespace App\Controller;
use Symfony\Bundle\FrameworkBundle\Controller\AbstractController;
use Symfony\Component\Form\Extension\Core\Type\FormType;
use Symfony\Component\HttpFoundation\Response;
class DefaultController extends AbstractController
{
public function search(): Response
{
$formBuilder = $this->createFormBuilder(null, [
'action' => '/search',
'method' => 'GET',
]);
// ...
}
}處理表單提交
若要處理表單提交,請使用 handleRequest() 方法
1 2 3 4 5 6 7 8 9 10 11 12 13 14 15 16 17 18 19 20 21 22 23 24 25 26 27 28 29 30
// src/Controller/TaskController.php
namespace App\Controller;
use Symfony\Bundle\FrameworkBundle\Controller\AbstractController;
use Symfony\Component\Form\Extension\Core\Type\DateType;
use Symfony\Component\Form\Extension\Core\Type\TextType;
use Symfony\Component\HttpFoundation\Response;
class TaskController extends AbstractController
{
public function new(Request $request): Response
{
$form = $this->createFormBuilder()
->add('task', TextType::class)
->add('dueDate', DateType::class)
->getForm();
$form->handleRequest($request);
if ($form->isSubmitted() && $form->isValid()) {
$data = $form->getData();
// ... perform some action, such as saving the data to the database
return $this->redirectToRoute('task_success');
}
// ...
}
}警告
表單的 createView() 方法應在呼叫 handleRequest() 之後 呼叫。否則,當使用表單事件時,在 *_SUBMIT 事件中所做的變更將不會套用至視圖(例如驗證錯誤)。
這定義了一個常見的表單「工作流程」,其中包含 3 種不同的可能性
在初始 GET 請求時(即當使用者「瀏覽」到您的頁面時),建立您的表單並呈現它;
如果請求是 POST,處理提交的資料(透過 handleRequest())。
然後
- 如果表單無效,重新呈現表單(現在將包含錯誤);
- 如果表單有效,執行一些動作並重新導向。
幸運的是,您不需要決定表單是否已提交。只需將目前的請求傳遞給 handleRequest() 方法。然後,Form 元件將為您完成所有必要的工作。
表單驗證
將驗證新增至表單最簡單的方式是透過建構每個欄位時的 constraints 選項
1 2 3 4 5 6 7 8 9 10 11 12 13 14 15 16 17 18 19 20 21 22 23 24 25 26 27 28
// src/Controller/DefaultController.php
namespace App\Controller;
use Symfony\Bundle\FrameworkBundle\Controller\AbstractController;
use Symfony\Component\Form\Extension\Core\Type\DateType;
use Symfony\Component\Form\Extension\Core\Type\TextType;
use Symfony\Component\HttpFoundation\Response;
use Symfony\Component\Validator\Constraints\NotBlank;
use Symfony\Component\Validator\Constraints\Type;
class DefaultController extends AbstractController
{
public function new(Request $request): Response
{
$form = $this->createFormBuilder()
->add('task', TextType::class, [
'constraints' => new NotBlank(),
])
->add('dueDate', DateType::class, [
'constraints' => [
new NotBlank(),
new Type(\DateTime::class),
],
])
->getForm();
// ...
}
}當表單被綁定時,這些驗證約束將會自動套用,並且錯誤將會顯示在錯誤欄位旁邊。
注意
如需所有內建驗證約束的列表,請參閱 驗證約束參考。
存取表單錯誤
您可以使用 getErrors() 方法來存取錯誤列表。它會傳回一個 FormErrorIterator 實例
1 2 3 4 5 6 7 8 9 10 11 12 13 14 15 16 17 18
$form = ...;

// ...

// a FormErrorIterator instance, but only errors attached to this
// form level (e.g. global errors)
$errors = $form->getErrors();

// a FormErrorIterator instance, but only errors attached to the
// "firstName" field
$errors = $form['firstName']->getErrors();

// a FormErrorIterator instance including child forms in a flattened structure
// use getOrigin() to determine the form causing the error
$errors = $form->getErrors(true);

// a FormErrorIterator instance including child forms without flattening the output structure
$errors = $form->getErrors(true, false);
清除表單錯誤
可以使用 clearErrors() 方法手動清除任何錯誤。當您想要驗證表單而不向使用者顯示驗證錯誤時(例如,在部分 AJAX 提交或 動態表單修改 期間),這非常有用。
因為清除錯誤會使表單有效,所以只有在測試表單是否有效之後,才能呼叫 clearErrors()。
瞭解更多
- Bootstrap 4 表單主題
- Bootstrap 5 表單主題
- 如何根據點擊的按鈕選擇驗證群組
- 如何建立自訂表單欄位類型
- 如何建立表單類型擴充功能
- 如何根據提交的資料選擇驗證群組
- 何時以及如何使用資料對應器
- 如何使用資料轉換器
- 如何使用 submit() 函數來處理表單提交
- 如何停用提交資料的驗證
- 如何使用表單事件動態修改表單
- 如何嵌入表單
- 表單事件
- 如何嵌入表單集合
- 如何自訂表單呈現
- 如何使用表單主題
- 如何使用 "inherit_data" 減少程式碼重複
- 如何使用多個按鈕提交表單
- Tailwind CSS 表單主題
- 建立自訂類型猜測器
- 如何單元測試您的表單
- 如何為表單類別設定空資料
- 如何動態設定表單驗證群組
- 如何定義要使用的驗證群組
- 如何在沒有資料類別的情況下使用表單